Introduction
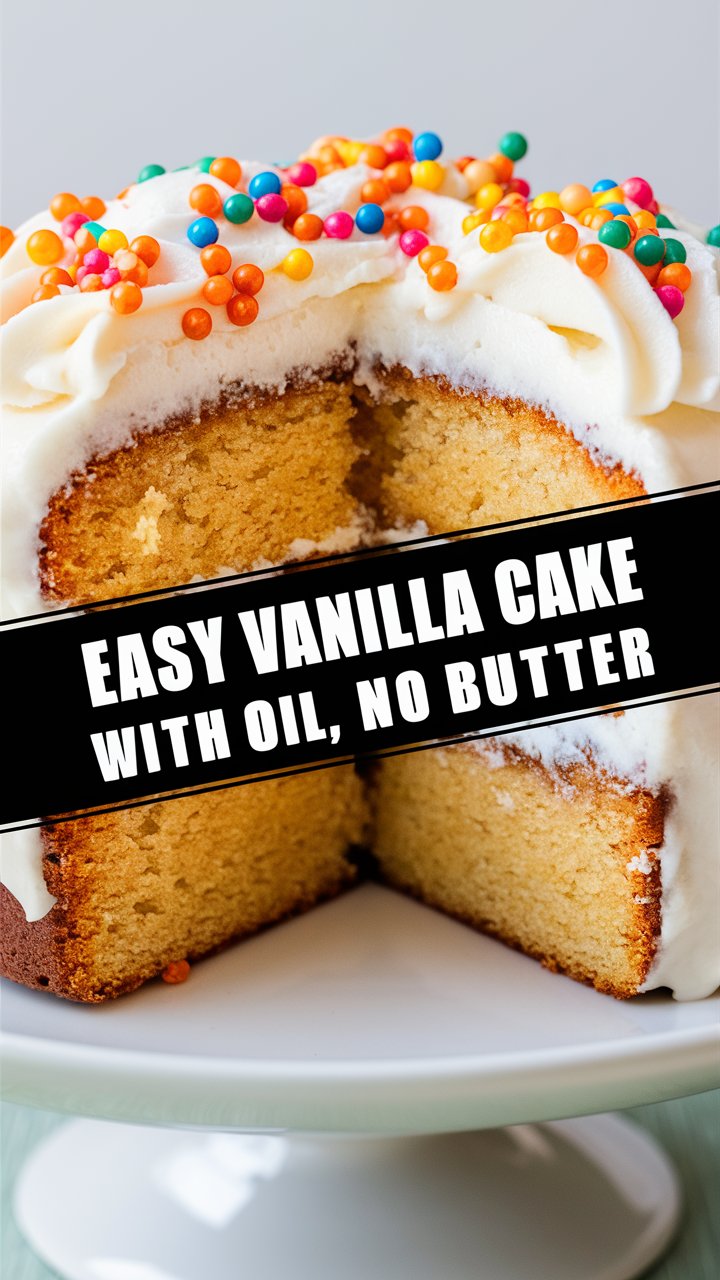
If you’ve ever craved a light, tender, and super moist vanilla cake but didn’t want to use butter — this is the recipe that will change the way you bake forever. Using oil instead of butter isn’t just a substitution; it’s a baking science upgrade. Oil-based cakes stay softer longer, hold moisture better, and have that perfect melt-in-the-mouth texture even when chilled.
Whether you’re baking for a birthday, tea party, or casual dessert, this easy vanilla cake with oil delivers bakery-quality results with simple pantry ingredients. It’s one of those rare recipes that even beginners can master — and professionals keep coming back to.
Why Make Vanilla Cake with Oil (Not Butter)?
1. Longer-Lasting Moisture
Butter solidifies at room temperature, while oil remains liquid. That means oil locks in moisture, giving your cake a tender, sponge-like texture that stays fresh for days.
2. Softer, Lighter Crumb
Oil coats the flour proteins more evenly than butter, reducing gluten formation and resulting in a softer crumb.
3. Neutral Flavor Profile
Using a neutral oil (like sunflower, canola, or vegetable oil) lets the pure vanilla essence shine without being overpowered by butter’s richness.
4. Perfect for All Seasons
Butter-heavy cakes can feel dense in cold weather. Oil-based cakes remain soft and sliceable even when refrigerated — ideal for make-ahead desserts.

Ingredients You’ll Need (and Why They Matter)
| Ingredient | Amount | Purpose |
|---|---|---|
| All-purpose flour | 2 cups (240g) | Provides structure and body |
| Granulated sugar | 1 cup (200g) | Sweetness + browning |
| Baking powder | 2 ½ tsp | Leavening for a fluffy rise |
| Salt | ½ tsp | Balances sweetness |
| Vegetable oil (or canola) | ¾ cup (180ml) | Keeps the cake ultra-moist |
| Eggs | 3 large | Adds structure, emulsifies oil and liquid |
| Whole milk | ¾ cup (180ml) | Moisture and richness |
| Pure vanilla extract | 2 tsp | Signature flavor |
| Optional: Yogurt or sour cream (2 tbsp) | For added tang and softness |
Pro Tip: Always use room temperature ingredients. It ensures even mixing and prevents curdling when oil meets eggs or milk.
Step-by-Step Instructions
Step 1: Preheat and Prepare
- Preheat your oven to 350°F (175°C).
- Grease a 9-inch round cake pan or line it with parchment paper.
Step 2: Mix Dry Ingredients
In a large bowl, sift together flour, baking powder, and salt. Sifting removes lumps and aerates the flour for a lighter cake.
Step 3: Combine Wet Ingredients
In a separate bowl, whisk eggs, sugar, and oil until creamy. Add milk and vanilla extract, whisking until smooth and slightly frothy.
Step 4: Combine and Mix
Slowly pour the wet ingredients into the dry mixture. Gently whisk until just combined — do not overmix, as it can make the cake dense.
Step 5: Bake
Pour batter into the prepared pan and smooth the top. Bake for 30–35 minutes, or until a toothpick inserted in the center comes out clean.
Step 6: Cool and Serve
Let the cake rest in the pan for 10 minutes before transferring it to a wire rack. Cool completely before frosting or serving plain with powdered sugar.
Expert Tips for Perfect Results Every Time
- Measure accurately. Too much flour leads to a dense crumb.
- Use fresh baking powder. Expired leavening = flat cakes.
- Avoid overmixing. Stir just until combined.
- Add yogurt for an extra-moist crumb (it mimics the texture of bakery cakes).
- Room temperature eggs emulsify oil better and give better rise.

Variations & Flavor Twists
- Lemon Vanilla Cake: Add 1 tbsp lemon zest and 1 tbsp lemon juice.
- Chocolate Marble Cake: Swirl ¼ cup cocoa powder mixed with a bit of batter.
- Coconut Vanilla Cake: Replace ¼ cup of milk with coconut milk.
- Berry Vanilla Cake: Fold in 1 cup of fresh or frozen berries before baking.
- Eggless Option: Substitute each egg with ¼ cup unsweetened applesauce or 3 tbsp yogurt.
Oil vs. Butter in Baking: The Science Explained
When creamed, butter traps air, creating a fluffier texture. However, oil provides superior moisture retention because it’s 100% fat (butter contains water). This makes oil-based cakes ideal for long storage or humid climates.
Moreover, oil keeps the cake texture consistent from day one to day three, whereas butter cakes can dry out.
Common Mistakes & How to Fix Them
| Problem | Cause | Solution |
|---|---|---|
| Cake too dense | Overmixed batter | Mix only until combined |
| Cake too dry | Overbaked or too little oil | Reduce baking time by 5 mins |
| Sunken center | Oven door opened early | Avoid opening before 25 mins |
| Greasy cake | Too much oil | Stick to precise measurements |
Storage, Shelf Life & Freezing
- Room temperature: Store in an airtight container up to 3 days.
- Refrigerated: Keeps moist for up to 1 week.
- Freezing: Wrap slices in cling film, then foil. Freeze for up to 2 months.
- To serve: Thaw at room temperature for 1 hour.
Serving Ideas
- Dust with powdered sugar for a classic look.
- Pair with whipped cream, fresh berries, or vanilla glaze.
- Slice into layers and fill with pastry cream or fruit compote.
- For a festive touch, drizzle with white chocolate ganache.
Nutrition Facts (Per Slice, Approx.)
| Nutrient | Amount |
|---|---|
| Calories | 275 kcal |
| Fat | 13g |
| Carbohydrates | 35g |
| Protein | 4g |
| Sugar | 20g |

Frequently Asked Questions (SEO-Focused FAQ)
Q1: Can I use olive oil instead of vegetable oil?
Yes, but use light olive oil for a milder flavor. Extra virgin olive oil can overpower the vanilla notes.
Q2: Can I make this vanilla cake without eggs?
Absolutely. Replace each egg with 3 tbsp plain yogurt or ¼ cup applesauce for a rich, soft texture.
Q3: Why is my cake dense or rubbery?
Most likely overmixing. Mix wet and dry ingredients only until they’re combined.
Q4: What frosting pairs best with this cake?
Whipped cream, buttercream, or cream cheese frosting all work beautifully.
Q5: Can I double this recipe?
Yes — double all ingredients and bake in a 9×13 inch pan for 40–45 minutes.
Conclusion
This Easy Vanilla Cake with Oil (No Butter) is the ultimate example of simplicity meeting perfection. It’s moist, soft, flavorful, and stays that way for days — no complicated steps, no fancy tools. Just the science of good baking done right.
Whether you’re a seasoned baker or trying this for the first time, this recipe gives you bakery-level results at home — every single time.