Flaky, Creamy, and Irresistibly Sweet Mini Desserts
📝 Meta Description
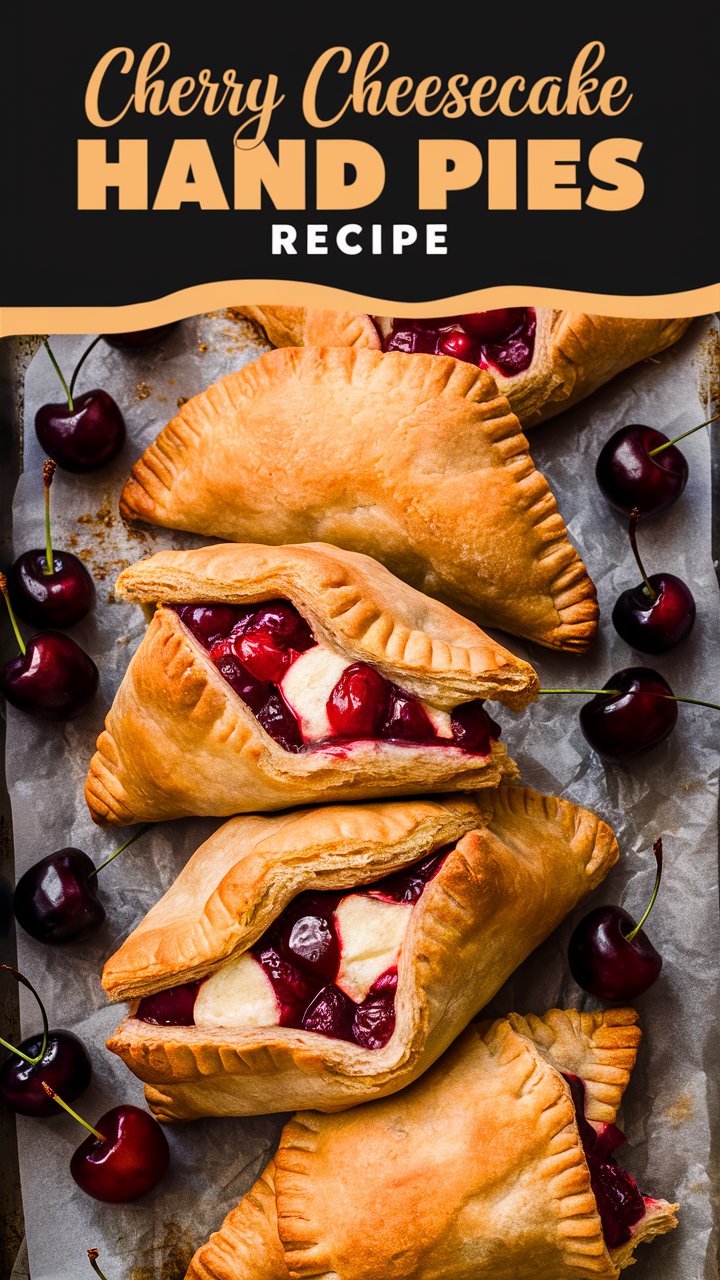
These Cherry Cheesecake Hand Pies feature a buttery, flaky crust filled with creamy cheesecake and tangy cherries — a handheld twist on a classic dessert!
💖 Introduction
Imagine the creamy richness of cheesecake wrapped in a golden, buttery crust — small enough to hold in your hand, yet decadent enough to impress at any gathering. That’s exactly what these Cherry Cheesecake Hand Pies deliver.
They’re portable, easy to make, and combine the best of both worlds: the crispness of a traditional pie and the silky smoothness of cheesecake. Perfect for holidays, picnics, bake sales, or whenever you crave something special.
🍰 Why You’ll Love This Recipe
✅ Portable & mess-free: No plates needed — just grab and go.
✅ Classic flavor combo: Tangy cherries + creamy cheesecake + flaky pastry = perfection.
✅ Make-ahead friendly: Dough and filling can be prepped ahead.
✅ Crowd-pleaser: Beautifully golden and irresistible at parties.
✅ Customizable: Try with other fruit fillings or chocolate drizzle.

🧂 Ingredients
🥧 For the Crust
- 2 ½ cups all-purpose flour
- 1 cup (2 sticks) unsalted butter, cold and cubed
- ½ teaspoon salt
- 1 tablespoon sugar
- ¼ to ½ cup ice water
Tip: Keep ingredients cold — cold butter creates flaky layers.
🍒 For the Cheesecake Filling
- 8 oz cream cheese, softened
- ¼ cup granulated sugar
- 1 teaspoon vanilla extract
- 1 egg yolk
🍒 For the Cherry Filling
- 1 ½ cups cherry pie filling (store-bought or homemade)
- Optional: ¼ teaspoon almond extract for a flavor boost
🍳 For the Egg Wash
- 1 egg beaten with 1 tablespoon water
🍬 Optional Glaze
- ½ cup powdered sugar
- 1–2 tablespoons milk
- ¼ teaspoon vanilla extract
👩🍳 Step-by-Step Instructions
Step 1: Make the Pie Dough
- In a bowl, combine flour, salt, and sugar.
- Cut in cold butter using a pastry cutter or food processor until mixture resembles coarse crumbs.
- Gradually add ice water, 1 tablespoon at a time, until the dough just comes together.
- Divide dough in half, wrap in plastic, and chill for 30 minutes.
Pro Tip: Do not overwork the dough — visible butter chunks = flaky pastry!
Step 2: Prepare the Cheesecake Filling
In a bowl, beat cream cheese, sugar, vanilla, and egg yolk until smooth and creamy. Set aside.
Step 3: Assemble the Hand Pies
- Roll out chilled dough on a floured surface to ⅛-inch thickness.
- Cut into 4-inch circles or squares.
- Add 1 teaspoon of cheesecake filling in the center, then 1 teaspoon of cherry filling.
- Brush edges with egg wash, top with another dough circle, and seal with a fork.
- Cut small vents on top.
Step 4: Chill and Bake
- Chill assembled pies for 10–15 minutes to prevent spreading.
- Preheat oven to 400°F (200°C).
- Brush tops with egg wash and bake for 18–22 minutes, until golden brown.
- Cool on a wire rack.
Step 5: Add the Glaze (Optional)
Whisk powdered sugar, milk, and vanilla until smooth. Drizzle over cooled pies for extra sweetness and shine.

🧠 Expert Baking Tips
- Use real butter, not margarine: It makes a big difference in flavor and texture.
- Don’t skip chilling: Cold dough prevents soggy bottoms.
- For extra shine: Sprinkle coarse sugar before baking.
- Freeze unbaked pies: Bake straight from frozen — just add 3–4 extra minutes.
- Homemade cherry filling: Simmer cherries, sugar, and cornstarch for a fresher taste.
🧁 Flavor Variations
- Blueberry Cheesecake Hand Pies: Swap cherry for blueberry filling.
- Chocolate Cherry: Add mini chocolate chips to the cheesecake layer.
- Cinnamon Sugar Crust: Sprinkle crust with cinnamon sugar before baking.
- Lemon Cheesecake: Mix 1 tablespoon lemon zest into filling.
🍽️ Serving Ideas
Serve warm or at room temperature with:
- A scoop of vanilla ice cream
- Whipped cream and a cherry on top
- A drizzle of melted white chocolate
Perfect for afternoon tea, dessert tables, or gifting during holidays!
🧊 Storage & Reheating
| Storage Method | How Long | Notes |
|---|---|---|
| Room Temperature | 1 day | Best texture same day |
| Refrigerator | 3–4 days | Reheat 5 min at 350°F |
| Freezer | Up to 2 months | Wrap individually in foil |

💬 Common Questions (FAQs)
Q1: Can I use canned cherry pie filling?
Yes! Canned filling works perfectly for convenience.
Q2: Can I use puff pastry instead of pie dough?
Absolutely. Puff pastry gives a lighter, crispier texture.
Q3: Can I make these ahead?
Yes — assemble, freeze unbaked, and bake straight from frozen when needed.
Q4: Why did my pies leak?
Overfilling or skipping the chill step can cause leaks. Keep fillings small and chill before baking.
Q5: Are they good cold?
Yes! The cheesecake filling firms up and tastes just like chilled cheesecake.
🧮 Nutrition (Per Pie, Approximate)
- Calories: 290
- Fat: 18g
- Carbs: 28g
- Protein: 4g
🧑🍳 Expert Note: The Science of the Perfect Hand Pie
The secret to a truly elite cherry cheesecake hand pie lies in butter temperature and moisture balance. Cold butter releases steam as it bakes, creating those delicate, flaky layers. The creamy filling adds moisture without sogginess because the fat content of cream cheese stabilizes the crust. This combination gives you a crisp outside and a smooth, melt-in-your-mouth interior — the hallmark of bakery-level pastry.
🌟 Final Thoughts
These Cherry Cheesecake Hand Pies are the perfect fusion of flavor, texture, and convenience. Whether you’re making them for a holiday dessert table or a cozy weekend treat, they’re guaranteed to impress.
Once you bake them, you’ll realize — this isn’t just another dessert; it’s a handheld masterpiece. 🍒✨